Where there is a will there is a way
Showing posts with label illustration. Show all posts

Sunday, January 4, 2015

Wonderful technique for creating woodcut cross-hatching effect in Illustrator

I have a job creating designs for bids for a construction company.  We were bidding on a job to build a new bypass through a range of mountains - a major project.  For the covers on all the folders and titlepages I created a vector illustration which mimicked a woodcut effect, as people used to use in early printing.  As they were printing with only black ink, illustrators cut cross-hatched lines as shading.

When I googled techniques others had used, where they were selling a variety of plugins - I found one very useful part of their technique, and used my eye to do the rest.  So now I can post my technique - to add to the shared knowledge online.  


First, I created a brush in Illustrator which looked rough like a woodcut slash.  Using this brush which narrowed off as I used it, I could brush one stroke at a time.  Theoretically I could have brushed all the cross-hatching one stroke at a time "by hand" on the computer, but it would have been very difficult to do.   SO you brush at two ends of the row, along a line you have drawn that defines the slope.  (See top centre of screenshot below.)


Then you choose both strokes, and choose BLEND under OBJECT.  This will create a row of strokes that are perfectly spaced.  Make sure you change BLEND OPTIONS to SPECIFIED STEPS.  (You can also do this after.)  Experiment with the options and see which is the best number of steps, perhaps 6, 5..  to shade the slope.  (See top centre  in screenshot below for blended strokes.)


Then, as you want to be able to erase at the base (where parts of stroke overlap your line), you EXPAND APPEARANCE, then EXPAND.  Then you will have a vector shape which can be erased at will with the eraser.  (See screenshots below.)


Another set of lines created shown in screenshots below.  (And the first screenshot shows the set trimmed where it extended below line.)


Adjusting


At the end I definitely removed the Google Earth reference photo of the Tanui mountain range.

My fellow designer had the idea of using a gradient behind the mountain range as well - like a sunrise.


Thursday, December 9, 2010

Tips on drawing swirlies in Illustrator

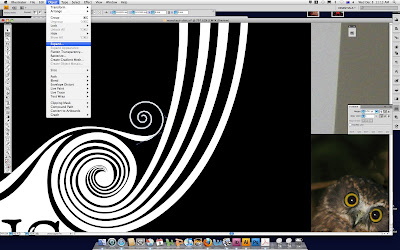
There is a great tutorial on how draw basic "swirls" or spiral shapes (the golden ratio pattern) by Bittbox called How to make custom swooshes, swirls and curls, where I first learned, which basically takes a tapering brush stroke to a spiral made with the Spiral Tool. You then Expand Appearance (no longer a line in the centre, but outlining the edges). Then you can cut out and add to your pattern using the Pathfinder tool. I am going to gather together here a few basic techniques in Illustrator that I use in illustration, if you don't know about them already. You can use the Spiral tool, as in the tutorial above, or, I often enjoy create spirals to my liking by drawing them manually with the pen tool, roughly at first then adjusting the nodes with the white selection arrow.

ADDING OR CUTTING USING A CIRCLE: After having created a few tapering swirlies, you can cut using simple circle shape and the Pathfinder tool. Or you can add the ball, which does the same but to your negative space. Know what I mean?


I can also just create a regular stroked line (not stroked with a tapered brush shape), expand that [Object then Expand or Expand Appearance], and just manually adjust the width of the shape's edges. Here I used the spiral tool.


Below, I created a shape to fill the space between the two swirls. Then I selected the shape, chose the eraser tool, set the size of the eraser brush to a small size and stroked the shape evenly with the eraser. (How cool is it that you can erase vector shapes? Another cool way to draw.)


My biggest advice for vector drawing anything in Illustrator or other such programs is to keep the shape loose in the beginning. Don't draw it perfectly as you go, you will just waste energy! As you get used to the pen tool, you can roughly make points for how many you need to make the curves you need, and how many you will need. Although your shape starts out wonky, you will control them in a moment using the Direct Selection (white arrow) tool.

Lately I've been "committing" to a shape. Instead of having many separate shapes, but which look like one (in case you want to change or go back) I've been truly merging shapes so it's one as-simple-as-possible vector, which is a beautiful thing. (Also great for printing T-shirts.)